
The Definitive Guide to Recovering CapCut Projects in Older Versions: Solving Version Incompatibility
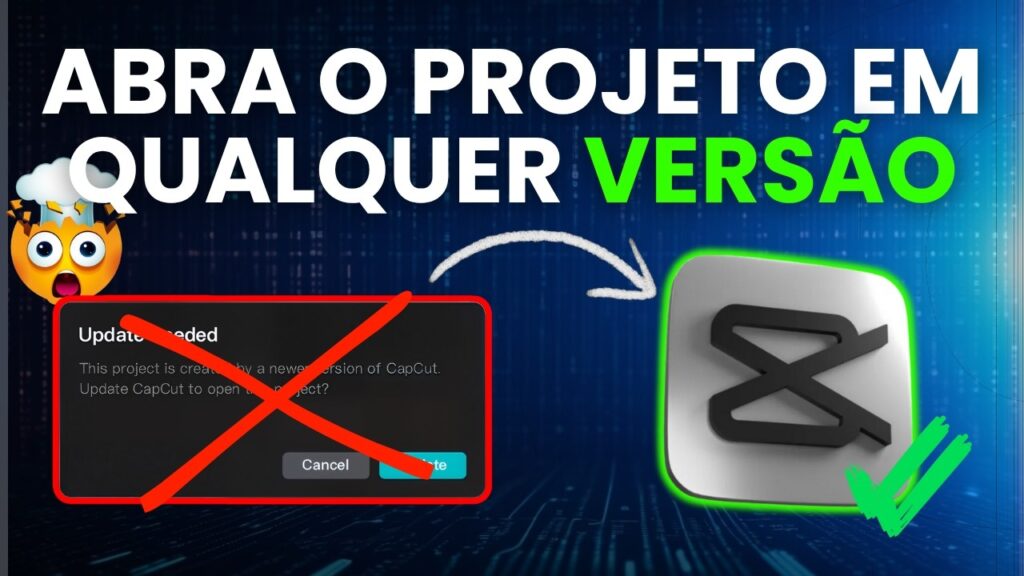
Imagine this scenario: you dedicated significant time and effort to editing a complex video, using transitions and effects you deemed essential. Suddenly, driven by the need to utilize free resources or avoid Pro subscriptions, you decide to open the project in an older CapCut version. The result is immediate and frustrating: a relentless error message informs you, “This project was created in a newer version of CapCut. Update now.”
This lockout imposed by version incompatibility can generate panic. Many editors fear that all their hard work is lost, especially if upgrading to the latest version is not a viable option—often because the desired features now require payment. However, maintaining calm is crucial. A precise technical method exists that can reverse this scenario, allowing you to recover and continue editing your project in the older version.
This detailed article will guide you through the reverse engineering of compatibility, exploring the direct manipulation of CapCut’s metadata files. You will learn how to modify the version control keys so that the older software recognizes the project as native. Mastering this technique ensures you maintain full control over your workflow, regardless of software updates.
Understanding CapCut Version Incompatibility: The Editor’s Dilemma
Instant frustration sets in when you try to open a meticulously edited project and the software rejects it outright. The error message, “This project was created in a newer version of CapCut. Update now,” acts as a digital wall, blocking access to your hard work. Many video editors encounter this roadblock daily, especially those who choose to utilize older CapCut versions to manage costs or access specific functionalities.
Why the Older Version Becomes a Sanctuary
The decision to use an outdated version, such as 2.3, is often driven not by preference but by strategic necessity. While newer CapCut versions offer enhanced functionalities and performance optimizations, they frequently restrict essential features, classifying them as “Pro” and demanding a paid subscription. Content creators working under tight budgets or just starting to explore video editing actively seek versions that still make these features available for free, prior to the implementation of paywall restrictions. This pursuit of unrestricted access drives the need to maintain specific software versions installed.
The Error Mechanism: How CapCut Identifies Project Creation
CapCut, like most robust editing software, registers crucial metadata within the project file. This metadata contains vital information, including the exact software version used to create the project and its last save time. When you attempt to open a file, CapCut compares the registered version (e.g., 6.5) with the version of the software you are currently running (e.g., 2.3). If the registered version is numerically superior, the program blocks access, assuming the older version cannot process the newer data structures. The solution lies in tricking the software by modifying this metadata to make it appear as if it were created in the older version.
The key to solving this problem lies in the manipulation of a specific JSON file that acts as the birth certificate of your project. Altering this certificate allows the editor to assume control over the file’s compatibility.
The Detailed Roadmap to Rescue Your Project: Reverse Engineering Compatibility
To successfully recover your project, you must implement a precise strategy that involves direct manipulation of the JSON configuration files. This process ensures that the older CapCut installation recognizes the structure and content of your work. The process is structured and demands attention to detail.
Preparation: Installing the Target Version and Locating the Source
First, ensure you have the specific CapCut version you wish to use (the target version) installed on your machine. Many third-party websites provide installation files for older versions, such as 2.3. If you decide to utilize this version, install it and prepare for the version cloning step.
The next critical step is to establish an essential reference point. CapCut generates a specific configuration file for every project, and we require a file that contains the version “signature” of your old installation. This file will serve as the data model for compatibility.
Creating the Reference Draft
This temporary draft is the starting point for metadata cloning. It incorporates the correct version identifiers that we need to inject into the problematic project.
- Open CapCut using the installed older version (e.g., 2.3).
- Click on “New Project.”
- Immediately after the editing interface opens, either close CapCut or return to the home screen.
By performing this action, the software creates a temporary draft. This new draft is crucial because it incorporates all the configuration settings and version identifiers specific to your old installation. This file will serve as our compatibility template, as it contains the version numbers that the old CapCut expects to find.
Locating the Configuration Files (JSON)
Manipulating the project file requires that you locate the specific folder where CapCut stores these drafts. This folder is the repository for all your unsaved and auto-saved projects.
- From the CapCut main screen, navigate to
Settings. - Select the
Projectstab. - In this section, you will find the exact path to the folder where all your drafts and projects are saved.
Access this directory. Inside, you will find both the newly created project (the reference draft) and the older project you are attempting to recover. The target file within each project folder is the draft_content.json.
Manipulating Metadata: Editing the draft_content.json File
The core of the solution resides in one specific file: draft_content.json. This file holds the version keys that we need to modify to convince CapCut that the project is compatible. Using a robust yet simple text editor, such as VS Code, facilitates viewing and editing the JSON.
The Version Cloning Process
First, open the draft_content.json file from the reference draft you just created in the old version. Search meticulously for the key that identifies the version: new_version. The numerical value associated with this key corresponds to your older version, and it is the exact number you need to copy.
Next, open the draft_content.json file of the project that is displaying the incompatibility error (the original project that was created in the newer version, e.g., 6.5). Identify the same new_version key. You will observe that its value is significantly higher (for example, 133, which corresponds to a 6.x version). Replace the high value (133) with the lower value you copied from the reference draft. This substitution informs CapCut that the project was, in fact, saved in the older version, bypassing the initial lockout.
Adjusting the app_version for Consistency Assurance
In addition to new_version, CapCut checks another version key to ensure file integrity: app_version. This key records the main application version. Typically, you will find two instances of this key within the JSON file, representing the main version and the minor fix version.
- Locate the first occurrence of
app_version. - Substitute the current version number (e.g., 6.0.0) with the exact numerical version of CapCut you installed (e.g., 2.3.0).
- Repeat the process for the second occurrence of
app_version, maintaining the same precision in the substitution.
Ensuring that both keys, new_version and app_version, point to the older version completes the project camouflage process. Performing this dual substitution ensures that CapCut does not find discrepancies during the integrity check.
Finalizing the Transactive Edit and Recovery
After performing these critical substitutions in the new_version and app_version fields, save the modified draft_content.json file. It is essential to ensure that the file encoding remains unchanged (usually UTF-8) to prevent data corruption. Any alteration to the JSON structure could invalidate the entire project.
With the file saved and ready, reopen CapCut. The project that was previously inaccessible should now appear as compatible with your 2.3 version. Click to open it and verify the timeline. This method allows you to continue editing your video without the necessity of migrating to a version that demands payment, resuming your workflow immediately.
Critical Analysis and Post-Recovery Conflict Resolution
While the metadata manipulation technique solves the fundamental incompatibility issue, it might introduce new challenges. Recovery ensures that the project opens, but it does not guarantee that all visual and functional elements will be intact. Complexity arises when resources that only existed in the newer version are called upon by the older version.
Addressing Missing Features and Pro Effects
If the original project utilized transitions, effects, or filters that were introduced only in the newer version (e.g., CapCut 6.5), the older version (e.g., 2.3) simply will not possess the source code to render them. The software will attempt to process the command, encountering a functional void.
The practical result may be the appearance of gaps in the timeline, error messages regarding unknown resources, or the application of a generic default effect in place of the missing Pro feature. To mitigate this issue, the editor must perform a comprehensive and manual review of the work.
To remedy these conflicts, follow these steps:
- Scroll through the timeline from start to finish, paying close attention to areas that used complex effects.
- Identify visually any clips that appear to be missing an effect or transition or that display an error marker.
- Replace the problematic resource with an effect or transition available in the older version.
This step requires patience but ensures the visual integrity of your final edit. Maintaining visual coherence makes the result professional, even when utilizing alternative resources from the older version’s more restricted library. Substituting the missing assets is an essential transactional step for successful project completion.
Insights on Version Management and Editing Workflow
The need to perform this manual correction highlights the importance of actively managing your editing software versions. To prevent future conflicts and the repetition of this process, consider incorporating the following practices into your workflow:
- Standardization: Commit to using a single, stable CapCut version for all long-term projects. This minimizes the risk of incompatibility.
- JSON Backup: Before accidentally opening a project in a newer version, make a backup of the original
draft_content.jsonfile. This allows for faster recovery should the new software attempt to permanently update the metadata. - Transactional Knowledge: Learning how to manipulate configuration files offers the editor greater control over their workflow, transforming a technical obstacle into a solvable opportunity and mastery of the tool.
The Context of Pro Features and the Search for Free Alternatives
The starting point for all this complexity is the quest for Pro functionalities without the subscription cost. CapCut offers powerful tools but restricts access to many of the most viral and high-quality features through a paywall. This restriction motivates the community to find alternative solutions.
The Pursuit of Advanced Functionalities Without Cost
Many creators depend on ‘viral’ transitions and effects to boost their content engagement. When these features migrate to the subscription model, the community actively searches for alternative routes. Exploring older software versions represents one such route, allowing the editor to maintain a high production standard without incurring prohibitive costs. Utilizing technical knowledge to circumvent these barriers is a valuable skill in the current editing landscape.
The Value of Community and Shared Knowledge
The technique of editing the JSON is not an official solution; it is knowledge generated and shared by the editing community seeking autonomy. Mastering these small hacks empowers the user to overcome limitations imposed by licensing policies and maintain creative freedom. This reinforces the idea that the editor should have full control over their project files, regardless of software updates. The ability to restore a project demonstrates the power of technical knowledge applied to editing, transforming passive editors into active problem solvers.
This metadata manipulation process demonstrates that, even in the face of software restrictions, final control over the work belongs to the creator, who can take action to ensure the continuity of their production.
Conclusion: Reclaiming Control Over Your Edit
We conclude that losing a CapCut project due to version incompatibility is not a final sentence. By implementing the technique of modifying the metadata in the draft_content.json file, the editor can reverse the lockout and regain access to their work. This process involves creating a reference draft, locating the new_version and app_version keys, and substituting the newer version identifiers with those of your installed older version.
Remember to thoroughly review the timeline to adjust any effects or transitions that might be missing or conflicting, utilizing resources available in the older version. Utilizing this method transforms a frustrating error into a solvable technical challenge, ensuring your editing workflow remains uninterrupted and productive.
You now possess the necessary knowledge to overcome version restrictions and save your project, strengthening your autonomy as a video editor.
For additional information on how to utilize Pro features for free, explore the video that inspired this technical article: